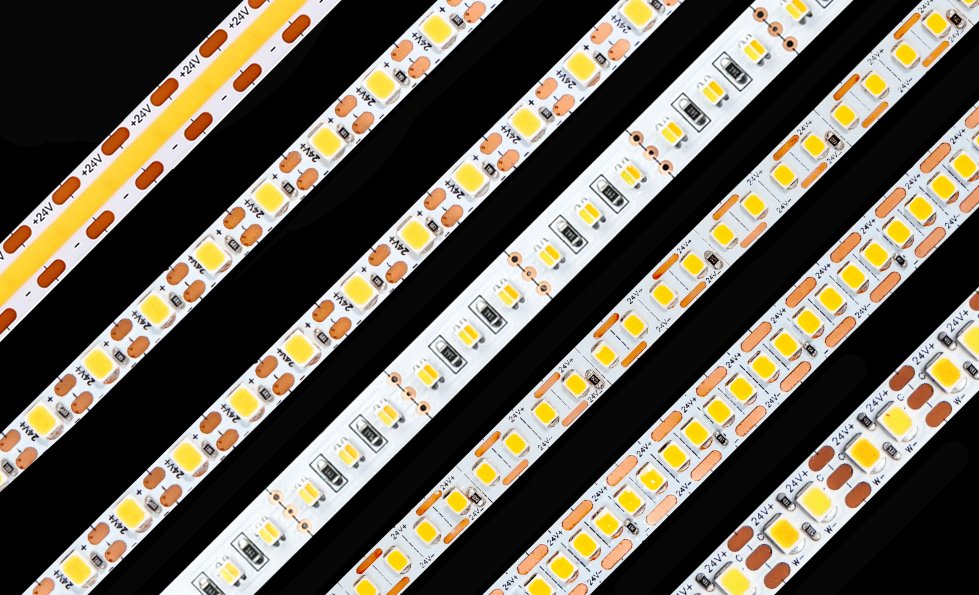
More LEDs per meter do not automatically produce more light.
A 240 LEDs/m strip can be dimmer, hotter and less efficient than a well-designed 120 LEDs/m strip. Conversely, a high-efficiency strip can save energy while still producing visible dots if its LED spacing, aluminum profile and diffuser are unsuitable.
High density and high efficiency solve different problems:
- High-density LED strips primarily improve light distribution and visual continuity.
- High-efficiency LED strips primarily reduce the electrical power required to produce a given amount of light.
Some products can achieve both. But LED density, luminous output and luminous efficacy must be evaluated separately.
The correct choice depends on whether the project is limited by:
- Visible LED dots
- Energy consumption
- Available driver capacity
- Heat
- Profile depth
- Target lumens per meter
- Circuit length
- Operating cost
- PCB width
- Color quality
- Purchase price
Quick Answer: Which Is Better?
Choose a high-density LED strip when the main priority is:
- A smoother line of light
- A shallow aluminum profile
- Close viewing distances
- Reduced spacing between light points
- More uniform illumination of reflective surfaces
- Improved appearance at lower diffuser depths
Choose a high-efficiency LED strip when the main priority is:
- Lower energy consumption
- Lower watts per meter
- Reduced heat
- Smaller electrical loads
- Longer practical circuit design
- Lower driver and cable requirements
- Reduced operating cost
- More light from a limited power budget
If the project requires both visual continuity and low energy consumption, do not select by LEDs/m alone. Compare complete candidates at the same CCT, CRI, light output, voltage, profile, diffuser and operating temperature.
Density, Output and Efficiency Are Three Different Specifications
These three terms are frequently mixed together.
LED Density: LEDs per Meter
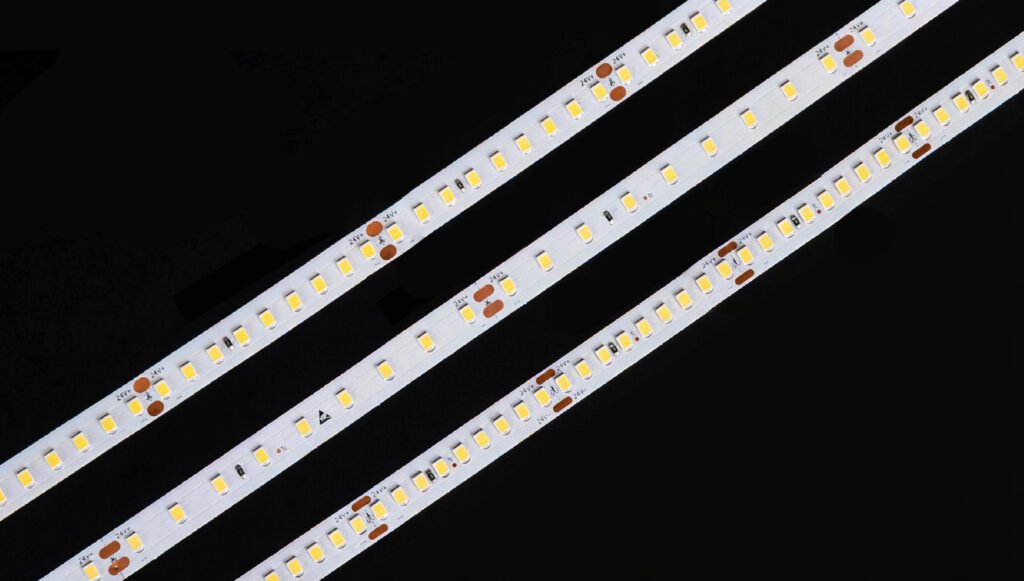
LED density describes the number of LED packages or light-emitting elements installed along a strip.
Examples include:
- 60 LEDs/m
- 120 LEDs/m
- 180 LEDs/m
- 240 LEDs/m
Density primarily affects LED pitch.
For a conventional SMD strip:
LED pitch in millimeters = 1,000 ÷ LEDs per meter
Examples:
| LED density | Approximate pitch |
|---|---|
| 60 LEDs/m | 16.7 mm |
| 120 LEDs/m | 8.3 mm |
| 180 LEDs/m | 5.6 mm |
| 240 LEDs/m | 4.2 mm |
A smaller pitch can improve optical uniformity, but it does not reveal how hard each LED is driven.
Light Output: Lumens per Meter
Lumens per meter describes how much visible light the strip produces along a given length.
A strip can achieve higher lumens per meter by using:
- More LEDs
- Larger or more efficient LED packages
- Higher drive current
- Higher watts per meter
- Better thermal management
- More efficient circuit design
- A spectrum with higher luminous efficacy
Lumens per meter is an output specification. It does not tell you how much energy was required to produce that output.
Luminous Efficacy: Lumens per Watt
Luminous efficacy describes how effectively electrical power is converted into visible light:
Luminous efficacy = luminous flux ÷ electrical input power
It is expressed in lumens per watt, or lm/W.
The Illuminating Engineering Society notes that efficacy can refer to a source, component, luminaire or complete system, so the measurement boundary should always be identified. See the IES definition of luminous efficacy.
For LED strip projects, at least three efficacy values may exist:
LED Package Efficacy
The performance of the individual LED package under specified laboratory conditions.
LED Strip Efficacy
The lumens produced by the assembled strip divided by the DC electrical power measured at the strip.
Installed System Efficacy
The usable light after the profile and diffuser divided by the AC power entering the driver.
These numbers are not interchangeable.
The Simple Equation That Prevents Most Selection Mistakes
For a white LED strip:
Lumens per meter ≈ watts per meter × strip efficacy
Consider two hypothetical products.
Strip A: High Density
- 240 LEDs/m
- 14.4 W/m
- 110 lm/W
Estimated output:
14.4 W/m × 110 lm/W = 1,584 lm/m
Strip B: High Efficiency
- 120 LEDs/m
- 9.6 W/m
- 165 lm/W
Estimated output:
9.6 W/m × 165 lm/W = 1,584 lm/m
Both strips produce the same nominal lumens per meter.
However:
- Strip A has twice as many LED packages
- Strip A consumes 50% more power
- Strip A may create a smoother visible line
- Strip B requires less power for the same output
- Strip B may run cooler
- Strip B may need a deeper or more diffusing profile to hide the LED points
The correct choice depends on whether optical uniformity or energy performance is more difficult to achieve in the actual installation.
Does Adding More LEDs Improve Efficiency?
It can—but not automatically.
If more LEDs share the same total strip power, each LED may operate at a lower current. LEDs can become less efficient when driven at higher current density, a behavior commonly called efficiency droop.
The U.S. Department of Energy’s solid-state lighting research identifies both current droop and thermal droop as factors that reduce LED efficacy. Lower current density can improve package efficacy, while higher operating temperature can reduce output and efficacy. See the DOE Solid-State Lighting R&D Plan.
This creates two very different high-density designs.
Design 1: More LEDs at the Same Total Power
Example:
- Standard strip: 120 LEDs/m at 9.6 W/m
- High-density strip: 240 LEDs/m at 9.6 W/m
In the high-density version, the available power is distributed across more emitters.
Potential benefits include:
- Lower current per LED
- Improved optical uniformity
- Lower localized thermal loading
- Potentially improved package efficacy
- Less visible stress on individual LED packages
Whether efficacy actually improves depends on the LED package, resistor or current-control design, forward-voltage distribution and PCB losses.
Design 2: More LEDs Driven at Similar Current
Example:
- Standard strip: 120 LEDs/m at 9.6 W/m
- High-density strip: 240 LEDs/m at 19.2 W/m
Here, the additional LEDs substantially increase total power and output.
Potential consequences include:
- Higher lumens per meter
- Higher total heat
- Higher circuit current
- Greater voltage drop
- Larger driver requirement
- Greater cooling demand
Both products may be marketed as “high density,” but they solve different problems.
Always compare LEDs/m together with W/m, lm/m and lm/W.
Why More LEDs per Meter Can Run Hotter—or Cooler
LED density does not determine strip temperature by itself.
Temperature depends more directly on:
- Watts per meter
- PCB width
- Copper thickness and layout
- LED package efficiency
- Resistor or current-regulator losses
- Waterproof encapsulation
- Strip-to-profile contact
- Aluminum profile size
- Ambient temperature
- Airflow
- Mounting orientation
- Enclosure conditions
When a High-Density Strip Runs Hotter
It may run hotter when:
- More LEDs are added without reducing current per LED
- Watts per meter increase
- The same narrow PCB carries more power
- The strip is enclosed in silicone or polyurethane
- A small profile is used
- The strip is installed inside an insulated cavity
When a High-Density Strip Runs Cooler
It may run cooler or distribute heat more evenly when:
- Total watts per meter remain unchanged
- Current is divided across more LEDs
- Each LED operates at a lower current
- The PCB and copper construction are adequate
- The strip has good contact with a suitable aluminum profile
This is why “more LEDs create more heat” is only true when the electrical loading also increases.
Why a High-Efficiency Strip Usually Reduces Heat
Any input power not converted into emitted light eventually becomes heat within the strip and surrounding system.
A higher-efficacy strip can provide the same output using less electrical power.
Using the earlier example:
- High-density strip: 1,584 lm/m at 14.4 W/m
- High-efficiency strip: 1,584 lm/m at 9.6 W/m
The high-efficiency option uses 4.8 fewer watts per meter.
Across a 100-meter installation, that difference becomes:
4.8 W/m × 100 m = 480 W
If the lights operate 12 hours per day:
0.48 kW × 12 hours × 365 days = 2,102.4 kWh per year
That is before considering driver losses or differences in dimming schedules.
Lower power can also reduce:
- Driver quantity
- Circuit current
- Cable size
- Voltage drop
- Cooling demand
- Profile temperature
- Air-conditioning load
- Thermal stress on adhesives and components
However, energy savings should be calculated using the complete installed system—not only the LED package efficacy.
Why the Highest lm/W Number May Not Be the Best Product
A large lm/W value is attractive, but the test conditions may not match the project.
Before comparing efficacy, confirm the following.
Same CCT?
A 4000K or 5000K product should not automatically be compared with a 2200K or 2700K product.
Spectrum and phosphor design affect luminous efficacy.
Same CRI and Spectrum?
Higher color fidelity, strong R9 or specialized spectral requirements can reduce lm/W.
A CRI 80 strip and a CRI 95 strip are not equivalent merely because they produce the same number of lumens.
Same Operating Temperature?
LED output and efficacy generally decrease as junction temperature rises.
The U.S. Department of Energy distinguishes LED source efficacy from complete system performance and notes that thermal conditions, driver losses and optical design affect the result. See DOE LED Basics.
Ask whether the published efficacy was measured:
- Immediately after switch-on
- After thermal stabilization
- At 25°C ambient
- At a specified PCB or case temperature
- Inside an aluminum profile
- On a test plate
- In free air
Same Measurement Point?
Power can be measured:
- At the start of the strip
- At the driver DC output
- At the driver AC input
- Across a one-meter sample
- Across a complete reel
A system value measured at the AC input will include driver losses. A strip value measured at the DC input will not.
Same Sample Length?
A one-meter sample may not represent the performance of a five-meter or ten-meter run.
Longer samples can experience:
- PCB voltage drop
- Lower end-of-run current
- Uneven output
- Color variation
- Different average temperature
Same Optical Assembly?
Bare-strip efficacy does not include losses from:
- Diffusers
- Lenses
- Covers
- Reflectors
- Waterproof jackets
- Installation geometry
A high-density strip may allow the use of a clearer diffuser because its LED pitch is smaller. A lower-density strip may need a more diffusing cover that absorbs or redirects more light.
Therefore, the product with lower bare-strip efficacy could occasionally produce a competitive installed result if it enables a more efficient optical system.
High Density Primarily Solves an Optical Problem
The main reason to specify more LEDs per meter is usually visual uniformity.
Visible Dots and Bright Spots
Individual LEDs can appear as bright points when:
- The diffuser is close to the strip
- The profile is shallow
- The diffuser is highly transparent
- The viewing distance is short
- The surrounding material is glossy
- The strip is reflected in polished stone, glass or metal
- The strip illuminates a nearby surface at a shallow angle
Reducing LED pitch can make the luminance pattern more uniform.
However, density is only one part of the optical system.
Uniformity also depends on:
- Profile depth
- Diffuser transmission and diffusion
- Distance from LED to diffuser
- LED beam angle
- Internal profile reflectance
- Viewing angle
- Required brightness
- Dimming level
- Installation straightness
Is High-Density SMD Dotless?
Not under every condition.
Even a 240 LEDs/m SMD strip may show points when installed:
- Behind an extremely shallow clear cover
- At high output
- Against a glossy reflective surface
- At very close viewing distance
The correct way to approve a dotless result is to test the complete strip-profile-diffuser assembly.
For projects with very limited diffusion distance, compare high-density SMD with COB LED strips. COB can create a more continuous emitting surface, but it should still be evaluated for efficiency, heat, color consistency, cut length and low-level dimming appearance.
High Efficiency Primarily Solves an Energy and Thermal Problem
A high-efficiency strip is particularly valuable where a project has:
- Strict energy codes
- Large installed quantities
- Long operating hours
- Limited cooling
- Limited driver space
- Restricted circuit capacity
- Narrow profiles
- Sustainability targets
- High electricity costs
- Difficult maintenance access
The energy benefit becomes more important as project length and daily operating hours increase.
A decorative five-meter residential installation may not financially justify a large price premium for a small efficacy increase. A retail chain operating thousands of meters for 14–18 hours per day may reach a very different conclusion.
LEDs per Meter Does Not Determine Cut Length
Another common mistake is assuming that higher density always produces a shorter cutting interval.
Cut length depends on:
- Operating voltage
- Number of LEDs in each electrical segment
- Series-parallel circuit topology
- Resistor or current-regulator design
- Single-color or multichannel construction
- PCB layout
A 240 LEDs/m strip can have a longer cut unit than a lower-density product if its circuit contains more LEDs per segment.
Always request the actual cut length in millimeters.
This is especially important for:
- Shelves
- Display cases
- Furniture
- Stairs
- Signs
- Custom luminaires
- Prefabricated millwork
A smooth light line has little value if the strip cannot be cut to fit the physical module.
High Density Does Not Guarantee Better Color Consistency
More LEDs can make spatial light distribution smoother, but color consistency depends on:
- LED binning
- Phosphor consistency
- CCT tolerance
- Forward-current consistency
- PCB voltage drop
- Thermal uniformity
- Production mixing
- Repeat-order controls
A high-density strip using broad color bins can show more color inconsistency than a lower-density strip using tightly controlled LEDs.
For professional projects, specify:
- Nominal CCT
- Permitted CCT range
- Initial SDCM
- Batch-to-batch tolerance
- End-to-end color variation
- Repeat-order binning policy
- Approved golden sample
The Voltage-Drop Paradox: Lower Power Can Look More Efficient but Worse
A long strip with excessive voltage drop may draw less power than its nominal rating.
Because LEDs near the end receive lower voltage and current, the measured total power can fall. Under some conditions, lower-driven LEDs may also operate at higher package efficacy.
This can produce a misleading result:
- Lower measured watts
- Apparently acceptable average lm/W
- Poor end-of-run brightness
- Visible nonuniformity
- Color shift along the strip
A high efficacy figure does not compensate for an unusable light distribution.
For every candidate, verify:
- Input voltage
- Start voltage
- End voltage
- Start illuminance
- End illuminance
- Maximum permitted variation
- Test length
- Feed method
- Cable size
Use the LED strip voltage-drop and power-injection calculator to develop the circuit layout before comparing installed performance.
Constant-Voltage Circuit Losses Also Matter
Many constant-voltage LED strips use groups of LEDs with resistors or linear current-control components.
Electrical losses can occur in:
- Current-limiting resistors
- Linear regulators
- PCB copper
- Connectors
- Solder joints
- Feed cables
- Controllers
- Drivers
The efficiency of the circuit depends partly on how closely the LED forward voltage matches the supply architecture while retaining adequate control margin.
Too much voltage dropped across a resistor or linear regulator becomes heat rather than useful light.
A high-quality LED package cannot compensate for a poorly optimized strip circuit.
Compare the Complete Loss Chain
A professional comparison should track energy from the AC supply to useful light.
AC input
   ↓ driver loss
DC power delivered
   ↓ cable and connector loss
Power reaching the strip
   ↓ PCB and control-component loss
Power reaching the LEDs
   ↓ LED conversion loss
Bare-strip light
   ↓ profile and diffuser loss
Installed light
   ↓ geometry and surface loss
Useful light at the target
The best package-level efficacy does not automatically create the best project-level efficiency.
Useful System Efficacy
A more meaningful project metric is:
Useful system efficacy = useful light delivered to the target ÷ AC input power
For task lighting, the project may need to compare:
- Maintained lux on the work surface per input watt
- Vertical illuminance per input watt
- Installed lumens per AC watt
- Luminance uniformity at a backlit surface
- Required dimming level to achieve the design target
Worked Comparison: Same Output, Different Project Results
Assume two strips both provide a nominal 1,584 lm/m.
| Specification | High-density strip | High-efficiency strip |
| Density | 240 LEDs/m | 120 LEDs/m |
| Power | 14.4 W/m | 9.6 W/m |
| Strip efficacy | 110 lm/W | 165 lm/W |
| Nominal output | 1,584 lm/m | 1,584 lm/m |
| Profile depth required for target uniformity | Shallower | Potentially deeper |
| Heat load | Higher | Lower |
| Circuit current at 24V | 0.60 A/m | 0.40 A/m |
| Visual point spacing | Smaller | Larger |
Assume both are installed behind optical systems delivering 75% of bare-strip output.
Installed output:
1,584 lm/m × 0.75 = 1,188 lm/m
If the respective drivers operate at 90% and 92% efficiency:
High-Density System
AC input per meter:
14.4 W ÷ 0.90 = 16 W
Installed system efficacy:
1,188 lm ÷ 16 W = 74.3 lm/W
High-Efficiency System
AC input per meter:
9.6 W ÷ 0.92 = 10.43 W
Installed system efficacy:
1,188 lm ÷ 10.43 W = 113.9 lm/W
The high-efficiency system uses substantially less power for the same installed output.
But if the 120 LEDs/m product produces unacceptable dots in the available profile, it still fails the project requirement.
The correct engineering response may be to:
- Use a deeper profile
- Use a different diffuser
- Select a denser high-efficiency strip
- Use high-efficiency COB
- Reduce the required output
- Increase the viewing distance
- Redesign the installation detail
The decision should not be reduced to one specification number.
High-Density vs High-Efficiency: Project Decision
| Project condition | Usually prioritize | Why |
| Very shallow profile | High density | Smaller pitch helps optical blending |
| Directly visible strip | High density or COB | Continuity is the primary requirement |
| Glossy retail display | High density | Reflections reveal individual points |
| Large commercial installation | High efficiency | Energy and driver savings scale with length |
| Long daily operating hours | High efficiency | Lifecycle energy becomes significant |
| Limited ventilation | High efficiency | Lower power reduces thermal load |
| Small driver compartment | High efficiency | Lower connected load may reduce driver size |
| Strict energy code | High efficiency | Reduces watts for the required output |
| Short decorative installation | Balanced selection | Visual result may matter more than small energy savings |
| Backlit stone | System mock-up | Density, distance, optics and material transmission all interact |
| Ultra-narrow profile | High efficiency with thermal validation | Narrow PCB limits heat spreading |
| Camera or studio environment | Neither alone | Driver, PWM and flicker performance dominate |
| High-CRI retail lighting | Compare at equal CRI | Spectrum changes efficacy |
| Outdoor waterproof strip | High efficiency with thermal testing | Encapsulation can trap heat |
| Battery or solar system | High efficiency | Reduces energy storage requirements |
When High Density Is Worth Paying For
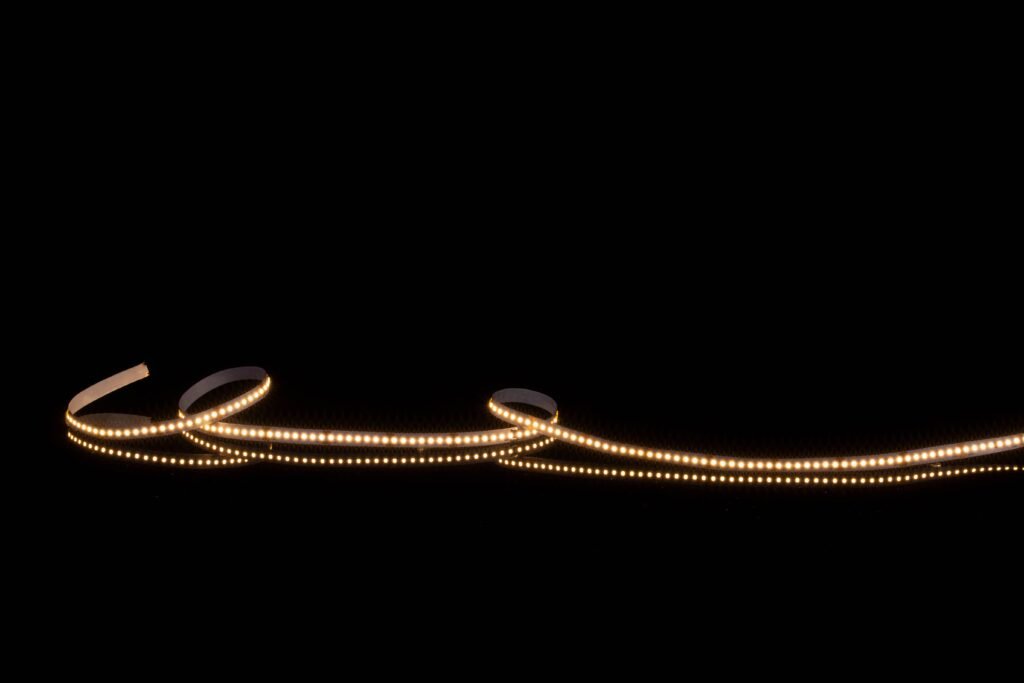
High density is usually justified when it allows the project to achieve something that a lower-density strip cannot achieve reliably.
Examples include:
- A continuous line in a shallow profile
- Smooth shelf lighting at close viewing distance
- Reduced reflections of individual LEDs
- More uniform illumination of translucent material
- Compact furniture integration
- Improved appearance in mirrors or polished surfaces
Do not pay for density purely because the larger number looks more premium.
Ask:
- What is the actual LED pitch?
- What profile depth is available?
- Which diffuser will be used?
- At what distance will the light be viewed?
- Is the light direct or reflected?
- What dimming levels must remain visually smooth?
- Has the complete assembly been sampled?
When High Efficiency Creates a Better Financial Return
High efficiency becomes increasingly valuable when:
- The installed length is large
- Operating hours are long
- Electricity is expensive
- Cooling costs are significant
- Driver and cable infrastructure are costly
- Maintenance access is difficult
- Thermal conditions affect reliability
Simple Energy-Cost Formula
Annual energy use = system power in kW × daily operating hours × operating days
Annual energy cost = annual energy use × electricity rate
For a valid comparison, use:
- Actual system power
- Real operating schedule
- Expected dimming profile
- Driver losses
- Local electricity rate
Do not calculate savings from LED package efficacy alone.
How to Compare Supplier Datasheets Correctly
Require both candidates to be reported under the same conditions.
Optical Data
Request:
- Lumens per meter
- Lumens per watt
- CCT
- CRI Ra
- R9 where relevant
- TM-30 data where relevant
- SDCM or chromaticity tolerance
- Spectrum
- Beam distribution
- Test length
- Measurement uncertainty
Electrical Data
Request:
- Nominal voltage
- Nominal and maximum W/m
- Actual stabilized power
- Current per meter
- Maximum run per feed
- Start and end voltage
- Cut length
- Circuit architecture
- Driver used for system testing
Thermal Data
Request:
- Ambient temperature
- Mounting method
- Aluminum profile
- Stabilization time
- PCB or Tc measurement point
- Maximum measured temperature
- Waterproof construction
- Derating requirements
Mechanical Data
Request:
- PCB width
- Copper construction where relevant
- Strip thickness
- LED pitch
- Connector compatibility
- Minimum bending radius
- Profile compatibility
Test Method
ANSI/IES LM-79 defines procedures for reproducible optical and electrical measurement of solid-state lighting products under controlled conditions. The current scope and reporting principles can be reviewed through the IES LM-79 information page.
For a flexible-strip comparison, confirm exactly what assembly was tested and do not assume a component report represents the complete installed system.
Five Datasheet Red Flags
1. Density Without Power
“240 LEDs/m” means little without W/m, lm/m and lm/W.
2. Efficacy Without CCT and CRI
A high lm/W value cannot be compared fairly when spectrum and color quality differ.
3. Lumens Without Test Temperature
Cold-start values may overstate stabilized performance.
4. Maximum Run Without Uniformity Criteria
A strip can continue emitting light far beyond the point where the end is acceptably bright.
5. Package Efficacy Presented as Strip Efficacy
LED package data excludes strip-level electrical and thermal losses.
How to Specify the Right Product in an RFQ
Instead of writing:
240 LEDs/m high-brightness LED strip required.
Write:
Provide a 24V LED strip capable of delivering at least 1,400 stabilized lumens per meter at no more than 10 W/m, 3000K, CRI Ra ≥ 90, within the specified color tolerance. The strip must produce an acceptably continuous light line inside the nominated profile and diffuser when viewed from the project distance. Supplier shall declare LED density, pitch, PCB width, cut length, maximum run per feed, thermal test conditions and end-to-end output variation.
This allows a supplier to propose a technically better solution rather than simply maximizing LED count.
Add a Supplier Response Table
| Requirement | Required value | Offered value | Evidence |
| Installed output | Project target | Supplier response | Photometric report/mock-up |
| Maximum power | Project limit | Supplier response | Electrical report |
| Strip efficacy | Minimum | Supplier response | Test report |
| LED density | Supplier to declare | Supplier response | Datasheet |
| LED pitch | Supplier to declare | Supplier response | Drawing |
| CCT and tolerance | Project requirement | Supplier response | Spectrum report |
| CRI/R9/TM-30 | Project requirement | Supplier response | Color report |
| Maximum run | Required circuit | Supplier response | Voltage-drop test |
| Operating temperature | Project limit | Supplier response | Thermal test |
| Optical uniformity | Approved sample | Supplier response | Mock-up |
Sample Approval: Test the Outcome, Not the Marketing Category
When comparing high-density and high-efficiency samples:
- Cut equal lengths.
- Use the specified operating voltage.
- Use the same profile where physically possible.
- Use the project diffuser.
- Measure DC power at the strip input.
- Allow both samples to reach stable temperature.
- Measure light output.
- Measure profile or PCB temperature.
- Compare end-to-end brightness.
- Inspect visible dots from the real viewing distance.
- Repeat at required dimming levels.
- Photograph both samples using fixed camera settings.
- Record CCT and color quality.
- Test the maximum proposed run.
- Calculate installed lumens per AC watt.
Do not approve the product from a brightly exposed one-meter sample mounted on a cold metal plate if the real application is a long waterproof strip inside an enclosed profile.
Frequently Asked Questions
Are more LEDs per meter brighter?
Not necessarily. Brightness depends on the output and operating current of each LED, total watts per meter, circuit design and temperature. Compare lumens per meter rather than LED count alone.
Does a high-density LED strip use more electricity?
Only if its total wattage is higher. A high-density strip can distribute the same power across more LEDs, or it can use more LEDs to increase total power and output.
Does higher LED density improve efficiency?
It can if more LEDs allow each package to operate at a lower, more efficient current. However, resistor losses, PCB losses, LED selection and temperature determine the final strip efficacy.
What is a good lm/W for an LED strip?
There is no single value appropriate for every project. The result depends on CCT, CRI, spectrum, waterproof construction, test temperature and whether the value describes the bare strip or complete system. Compare products under matched conditions.
Is a high-efficiency LED strip less bright?
No. A high-efficiency strip can produce the same lumens using less power or produce more lumens at the same power.
Is 240 LEDs/m better than 120 LEDs/m?
It is usually better for reducing visible spacing, but it is not automatically better for efficacy, temperature, voltage drop, cut length, cost or color quality.
Is COB more efficient than SMD?
Not automatically. COB often improves visual continuity, while SMD can achieve very high efficacy with optimized packages and drive conditions. Compare measured lm/W at the same CCT, CRI, power and temperature.
Can a lower-density strip look dotless?
Yes. A suitable profile depth, diffuser, viewing distance and optical design can blend a lower-density strip into a continuous line.
Does high efficiency mean the strip will last longer?
Lower power and temperature can reduce stress, but lifetime also depends on PCB design, solder joints, components, adhesive, encapsulation, driver quality and operating environment.
Which is better for commercial projects?
High efficiency is often financially important for large, long-running installations. High density may still be necessary for visible architectural details. Many commercial projects need a product optimized for both.
The Best LED Strip Is Often Both Dense Enough and Efficient Enough
High density and high efficiency are not opposing product categories.
A well-engineered strip can use:
- An LED pitch appropriate for the optical system
- Efficient LED packages
- Moderate drive current
- Optimized circuit voltage
- Adequate PCB copper
- Controlled color bins
- Suitable aluminum profiles
- Correct driver and feed architecture
The goal is not to maximize LEDs per meter or claim the largest lm/W number.
The goal is to meet the installed lighting requirement with:
- Acceptable visual uniformity
- Verified light output
- Controlled color quality
- Safe operating temperature
- Practical circuit lengths
- Reasonable driver and cable requirements
- Competitive lifecycle cost
Xmart Lighting offers separate high-density LED strip and high-efficiency LED strip platforms, including different density, wattage, CRI and PCB configurations.
For a project-specific comparison, provide:
- Target installed lumens per meter
- Available profile dimensions
- Diffuser type
- Viewing distance
- Required CCT and CRI
- Maximum watts per meter
- Segment and circuit lengths
- Ambient temperature
- Waterproof requirement
- Expected annual operating hours
Xmart can then compare whether the project should prioritize greater LED density, higher efficacy or a balanced custom configuration.
The most professional specification is not “use more LEDs.”
It is: use enough LEDs to achieve the required optical uniformity, then produce the required light with the lowest practical system power—without compromising color, temperature, reliability or installation cost.