
Most LED strip light problems do not start on site.
They usually start much earlier — when the strip is treated like a simple product instead of a full lighting system.
That is the real disadvantage of LED strip lights. A strip can look bright, pass a quick test, and still be the wrong choice for the job. It may run too hot, dim unevenly, fail in humidity, fall off the surface, or look inconsistent across the run.
If you know where LED strip lights usually go wrong, most of these problems can be avoided before installation.
Table of Contents
- Why LED strip lights go wrong?
- Higher system cost than buyers expect
- Heat still matters more than most people think
- The wrong CCT can make a space feel wrong
- Same CCT does not always look the same
- Dimming problems are usually system problems
- Installation gets complicated fast
- Adhesive is one of the weakest points
- Long runs still create voltage drop
- Wrong IP rating causes avoidable failures
- The real disadvantage is poor specification
- Final checklist before you buy
Why LED strip lights go wrong
The biggest misconception is simple:
If the strip turns on, the product choice was correct.
That is not true.
A strip can turn on and still be wrong for the application. It may run too hot, dim unevenly across a longer run, shift color between batches, fail to dim smoothly, detach from the surface, or age too fast in a sealed cavity. So the real question is not whether LED strip lights are good or bad. The real question is where they usually fail, and how to avoid that early.
Higher system cost than buyers expect
One reel price rarely tells the full story.
LED strip lighting can look affordable at first, but the total installed cost is often much higher than buyers expect. Once you add the power supply, controls, connectors, profiles, waterproofing, extra wiring, labor, and possible rework, the cheapest strip is often no longer the cheapest option.
A low-cost strip often becomes expensive when it needs:
- more power feeds
- more labor to install cleanly
- a driver replacement
- adhesive repair
- rework because the dimming system was never validated
- batch re-selection because the color does not match
How to avoid it
- Compare total cost, not reel cost
- Confirm driver, dimming, and mounting method early
- Ask about batch consistency, not just wattage and CCT
- For visible applications, prioritize light quality and consistency over the lowest price
Heat still matters more than most people think
A lot of buyers assume LED strips run cool, so thermal design does not matter.
That assumption causes a lot of failures.
Heat problems are more likely when strips are:
- installed in enclosed cavities
- mounted directly on low-conductivity surfaces
- used at high watt density in tight details
- sealed in hot or humid areas
- pushed too hard over longer runs
What this looks like on site
- brightness drops earlier than expected
- one section looks older than another
- white tone shifts over time
- adhesive softens faster
- the light looks tired sooner than it should
How to avoid it
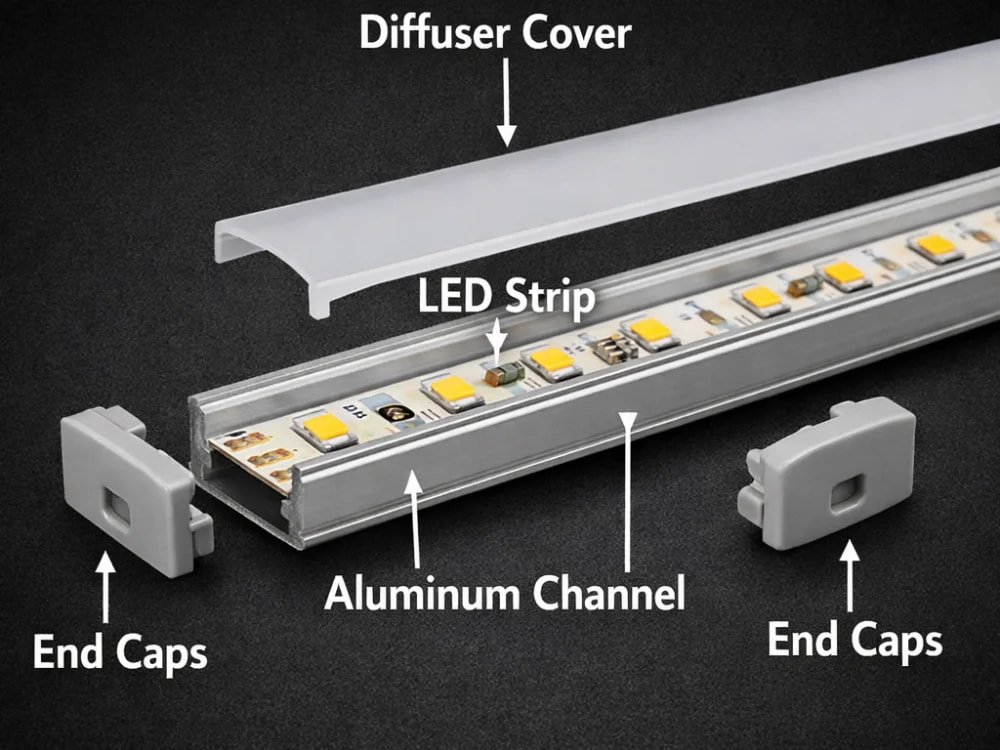
- Use aluminum profile where heat buildup is likely
- Do not default to the highest wattage reel
- Match output to the application instead of overspecifying brightness
- Treat thermal path as part of the product choice, not an afterthought
The wrong CCT can make a space feel wrong
This issue is often explained badly.
The problem is not simply that LED light is harsh. The real problem is that the wrong color temperature in the wrong space feels wrong immediately.
A strip that works well in:
- retail shelving
- task lighting
- commercial displays
- work zones
may feel too cold or aggressive in:
- bedrooms
- hotel rooms
- lounge areas
- residential cove lighting used at night
How to avoid it
- Use warmer CCTs in rest-oriented spaces
- Use cooler whites where task visibility matters more
- Use tunable white when one space needs more than one mood
Same CCT does not always look the same
A label that says 4000K does not guarantee every reel will visually match.
This is one of the most underestimated disadvantages of LED strip lighting. One cabinet run may look slightly greener, one cove may look warmer than the next, and replacement reels may not match the original installation. Large projects can look patchy even when the spec sheet shows the same CCT.
Why it happens
- loose chip binning
- phosphor variation
- weak batch control
- inconsistent QC on chromaticity
How to avoid it
- Ask about batch consistency, not just CCT
- Keep one project within one approved production batch where possible
- Request sample approval on visual-critical jobs
- For visible applications, prioritize consistency over lowest price
Dimming problems are usually system problems
When a strip flickers, drops out, or refuses to dim cleanly, the strip often gets blamed first.
But in many cases, the real issue is the system combination:
- strip
- driver
- controller
- dimmer
- protocol
- wiring layout
Common symptoms
- flicker at low dim levels
- poor dimming range
- one channel behaving differently from another
- color shift when dimmed
- the system works on the bench but not on site
How to avoid it
- Decide the dimming protocol early
- Validate strip, driver, and controller together
- Do not assume two 24V products will dim properly just because the voltage matches
- Treat controls as part of the strip specification
Installation gets complicated fast
LED strip looks simple online because finished photos hide the difficult parts.
The complexity usually appears when the project includes:
- corners
- profiles
- cabinet gaps
- multiple power entries
- waterproof sealing
- visible direct-view lines
- concealed driver locations
- service access requirements
The common mistake is choosing the strip first, then trying to force the installation around it.
That is backwards.
Better approach
Start with:
- where the strip will sit
- whether it will be visible
- whether the space is dry, humid, outdoor, or submerged
- how power will enter
- where the driver will be hidden and serviced
- whether the profile width matches the PCB width
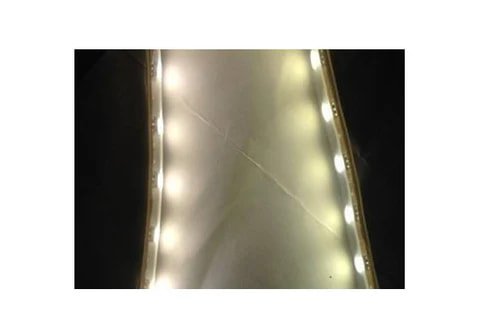
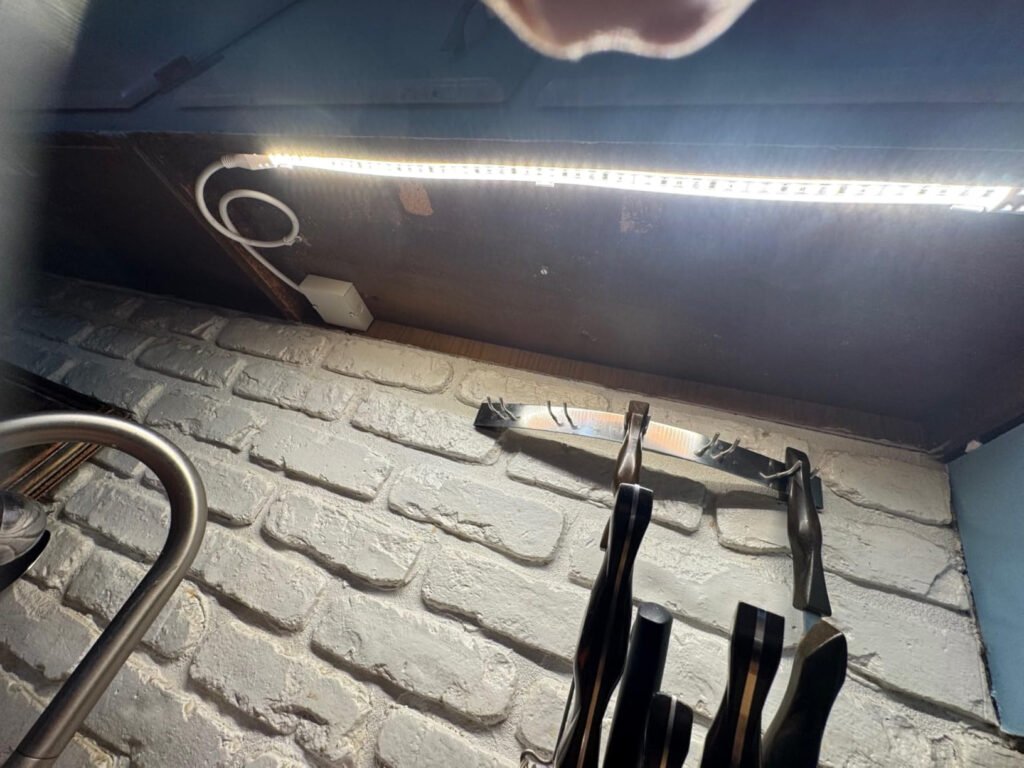
Adhesive is one of the weakest points
This is one of the most common field failures.
Many buyers still treat adhesive tape like a guaranteed mounting method. It is not. Adhesive performance depends heavily on surface cleanliness, temperature, humidity, mounting direction, and long-term heat from the strip itself.
Typical failure conditions
- dusty wood interiors
- textured painted surfaces
- warm kitchen zones
- humid bathrooms
- upside-down mounting
- outdoor exposure
- strips running warmer than expected
How to avoid it
- Clean the surface properly
- Do not trust basic tape alone in demanding installs
- Use profiles, clips, or mechanical fixing where gravity, heat, or humidity increase risk
- Treat mounting method as part of the product decision
Long runs still create voltage drop
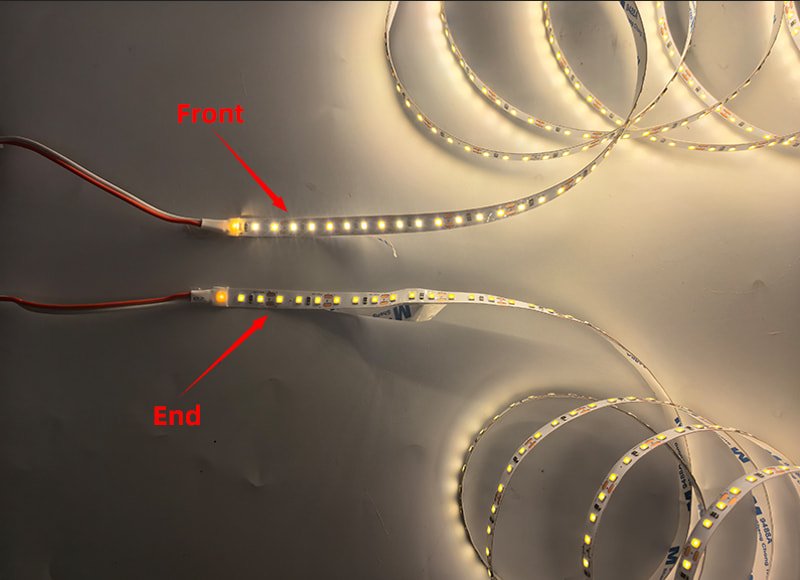
This is one of the biggest technical mistakes in strip-light projects.
As run length increases, voltage drop becomes more visible. That can show up as lower brightness at the far end, white-tone inconsistency, RGB imbalance, or unstable performance.
Signs of voltage drop
- the end of the run is dimmer
- the light color changes along the length
- long coves look uneven
- installers start adding feeds as a fix after the fact
How to avoid it
- Use 36V/48V led strip where appropriate
- Plan feed points before ordering
- Use power injection when needed
- Stop forcing standard short-run strips into oversized jobs
- For very long runs, move to products designed for that use case
Wrong IP rating causes avoidable failures
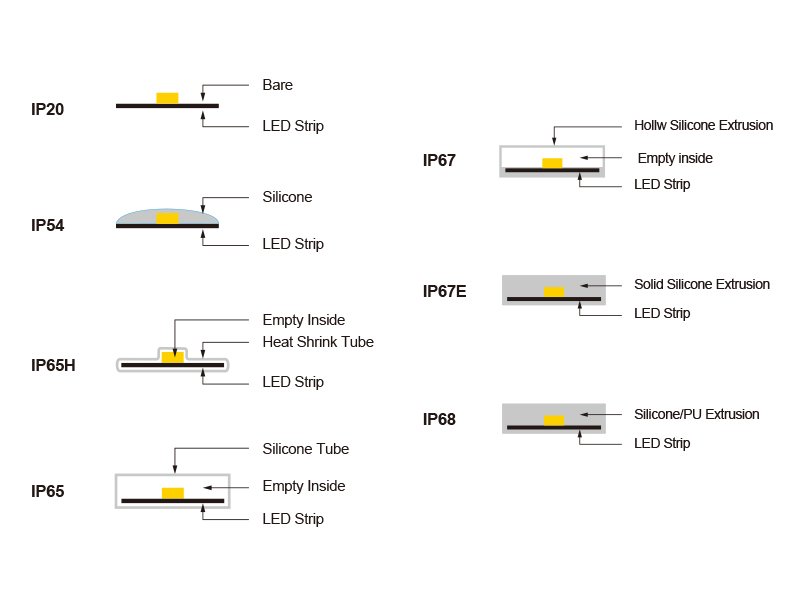
A strip is not suitable for outdoor or wet use just because a seller calls it waterproof.
That word is too vague to be useful. Common mistakes include using IP20 in humid joinery, using light protective coating where direct spray is possible, or assuming the strip rating alone solves the whole protection problem.
How to avoid it
Match protection to the real environment:
- dry indoor
- damp indoor
- direct outdoor exposure
- submerged or industrial conditions
Also remember that the strip, connector, cable entry, and driver location need to work together as one protection system.
The real disadvantage is poor specification
This is the main point of the whole topic.
Most LED strip disadvantages are manageable. What creates failure is poor specification. A strip that works well for one project can fail in another because the real requirement changed:
- longer run
- tighter color match
- visible light line
- lower dimming level
- hotter cavity
- humid environment
- harder service access
That is why the smartest way to buy LED strip is to start with project conditions, not with a reel photo or a wattage line.
Ask these questions first
- Where will the strip be used?
- Will it be visible or hidden?
- Is the space dry, humid, outdoor, or industrial?
- How long is the run?
- Does it need dimming?
- What matters more: brightness, uniformity, CRI, or color effects?
- Where will the driver go, and how will it be serviced?
Final checklist before you buy
Before ordering LED strip lights, confirm:
- application
- visibility of the strip
- required IP level
- strip voltage
- total run length
- feed strategy
- driver type
- dimming protocol
- color consistency requirement
- mounting method
- service access
That is a much more reliable buying path than comparing strips by price or wattage alone.
Not sure which LED strip is right for your project? Send us your application, run length, installation method, and environment. We will help you match the right strip, voltage, IP rating, and power setup before problems show up on site.